

DIY Window Valances
Window treatments can be tricky and really expensive, but I have made these simple, no-sew valances many times for several houses, and they always look great. I have used them in kitchens, bathrooms, bedrooms, and living rooms. They are versatile, easy, and they don’t leave horrible holes in your walls when you take them down which makes them a great choice for renters, too.
I first made these easy valances for our 1980s Cabin in the City — our first renovation. In this home we used them with light-filtering roller shades which couldn’t be seen unless they were pulled down.
I have made them for several other homes since then, and each time they look different depending on the room and the fabric chosen. I decided to use them again for the Spring 2019 One Room Challenge, because the furniture layout for this room makes curtains impractical. So I needed a clean and elegant way to dress the windows providing both privacy and light control, and to introduce another beautiful fabric.
Before you begin, you will need to make some decisions and get some measurements:
Does your window have trim around it? If so, measure to include the trim as you will want the valance to wrap around the trim.
How tall is your window? You will want to size your lumber accordingly.
Small windows? Consider mounting the valance above the window which makes the window appear taller.
Do you also want drapes or shades?
For drapes: you can mount the drapery hardware inside the valance box (great for renters) or to the wall itself. Consider the dimensions of your hardware when cutting lumber to make your valance boxes. You can even use tension rods!
For shades or blinds: if mounting inside the window, no accommodations need to be made except providing clearance. If mounting outside the window, consider the dimensions of the shade or blind when measuring for the valances.
Materials:
fabric
backing fabric (optional, see note below)
lumber (see note below)
screws
quilting batting: I use a medium weight poly batting.
L brackets (2 per valance)
drill
a saw or have lumber cut by lumber yard
staple gun
staples
hammer
Choosing Fabric: when buying fabric, you must consider the direction the fabric’s pattern runs and the fabric’s width. In the 1980s Cabin in the City great room, I used an upholstery fabric which was 54” wide. The pattern on the fabric looked fine running both directions, so I was able to get two valances from the width of the fabric. However, in the One Room Challenge room, I chose a fabric which was 36” wide with a pattern that could only run across, so I had to piece the fabric at both ends to make it long enough for my 48” wide windows.
If you don’t sew, choose fabric where the pattern either runs the length of the fabric or where the direction doesn’t matter. Then buy enough for the length of your valance plus extra to wrap the corners. I would recommend at least 1/2 yard extra — perhaps more.
Choose your fabric first, then calculate the yardage you will need for each window valance. Don’t forget to include wrapping around the return and the back, too.
Backing Fabric: if the back of your valance will be visible through the window, you may want to line the back with a fade-resistant fabric like Sunbrella that coordinates with your colors. This step is only necessary if the valance will be very visible through the window (on a first floor, for example, or on the front of the house), and if you are concerned about fading.
Lumber: for the One Room Challenge room, we used 1 x 10 boards for the length and scrap plywood for the returns. If you don’t have scraps, use a 1 x 2 or 1 x 3 for the returns depending on how much clearance you need at the front of the window. If you don’t have a saw, measure carefully, calculate, and then ask the lumber yard to cut for you.


Easy valances in the great room of the 1980s Cabin in the City, our first renovation.

On this small window in the kitchen, we used a 1 x 5 board with the same fabric as in the great room which tied the rooms together.

Our first home in Sacramento, California, was built on the foundation of a 1930s home that burned down. Built in the 80s, the house was lacking in charm and style. But it had a fireplace and a cabin feel that we both fell in love with immediately. So, over eight years we gutted and updated that house transforming it from an 80s beast into a 21st century charmer.

Step 1: Piece the fabric
Piece your fabric as needed making sure to match the pattern. While it is more work, I pieced the fabric on both ends so that there were two seams equidistant from the ends of the valance for symmetry. Piecing takes more fabric, so keep that in mind when buying.

Step 2: Build the Valance
Once your wood is cut to the proper dimensions, screw it together. You are essentially building three sides of a rectangle: the front board plus two equal return pieces.

Step 3: Add the Brackets
Next screw on your L -brackets. If your window has trim, install the bracket so that it can then be screwed flush into the top of the trim. If your window does not have trim, rotate the bracket 90° so that the bracket can be screwed into the wall to hold up the valance.
Step 4: Lay out your materials
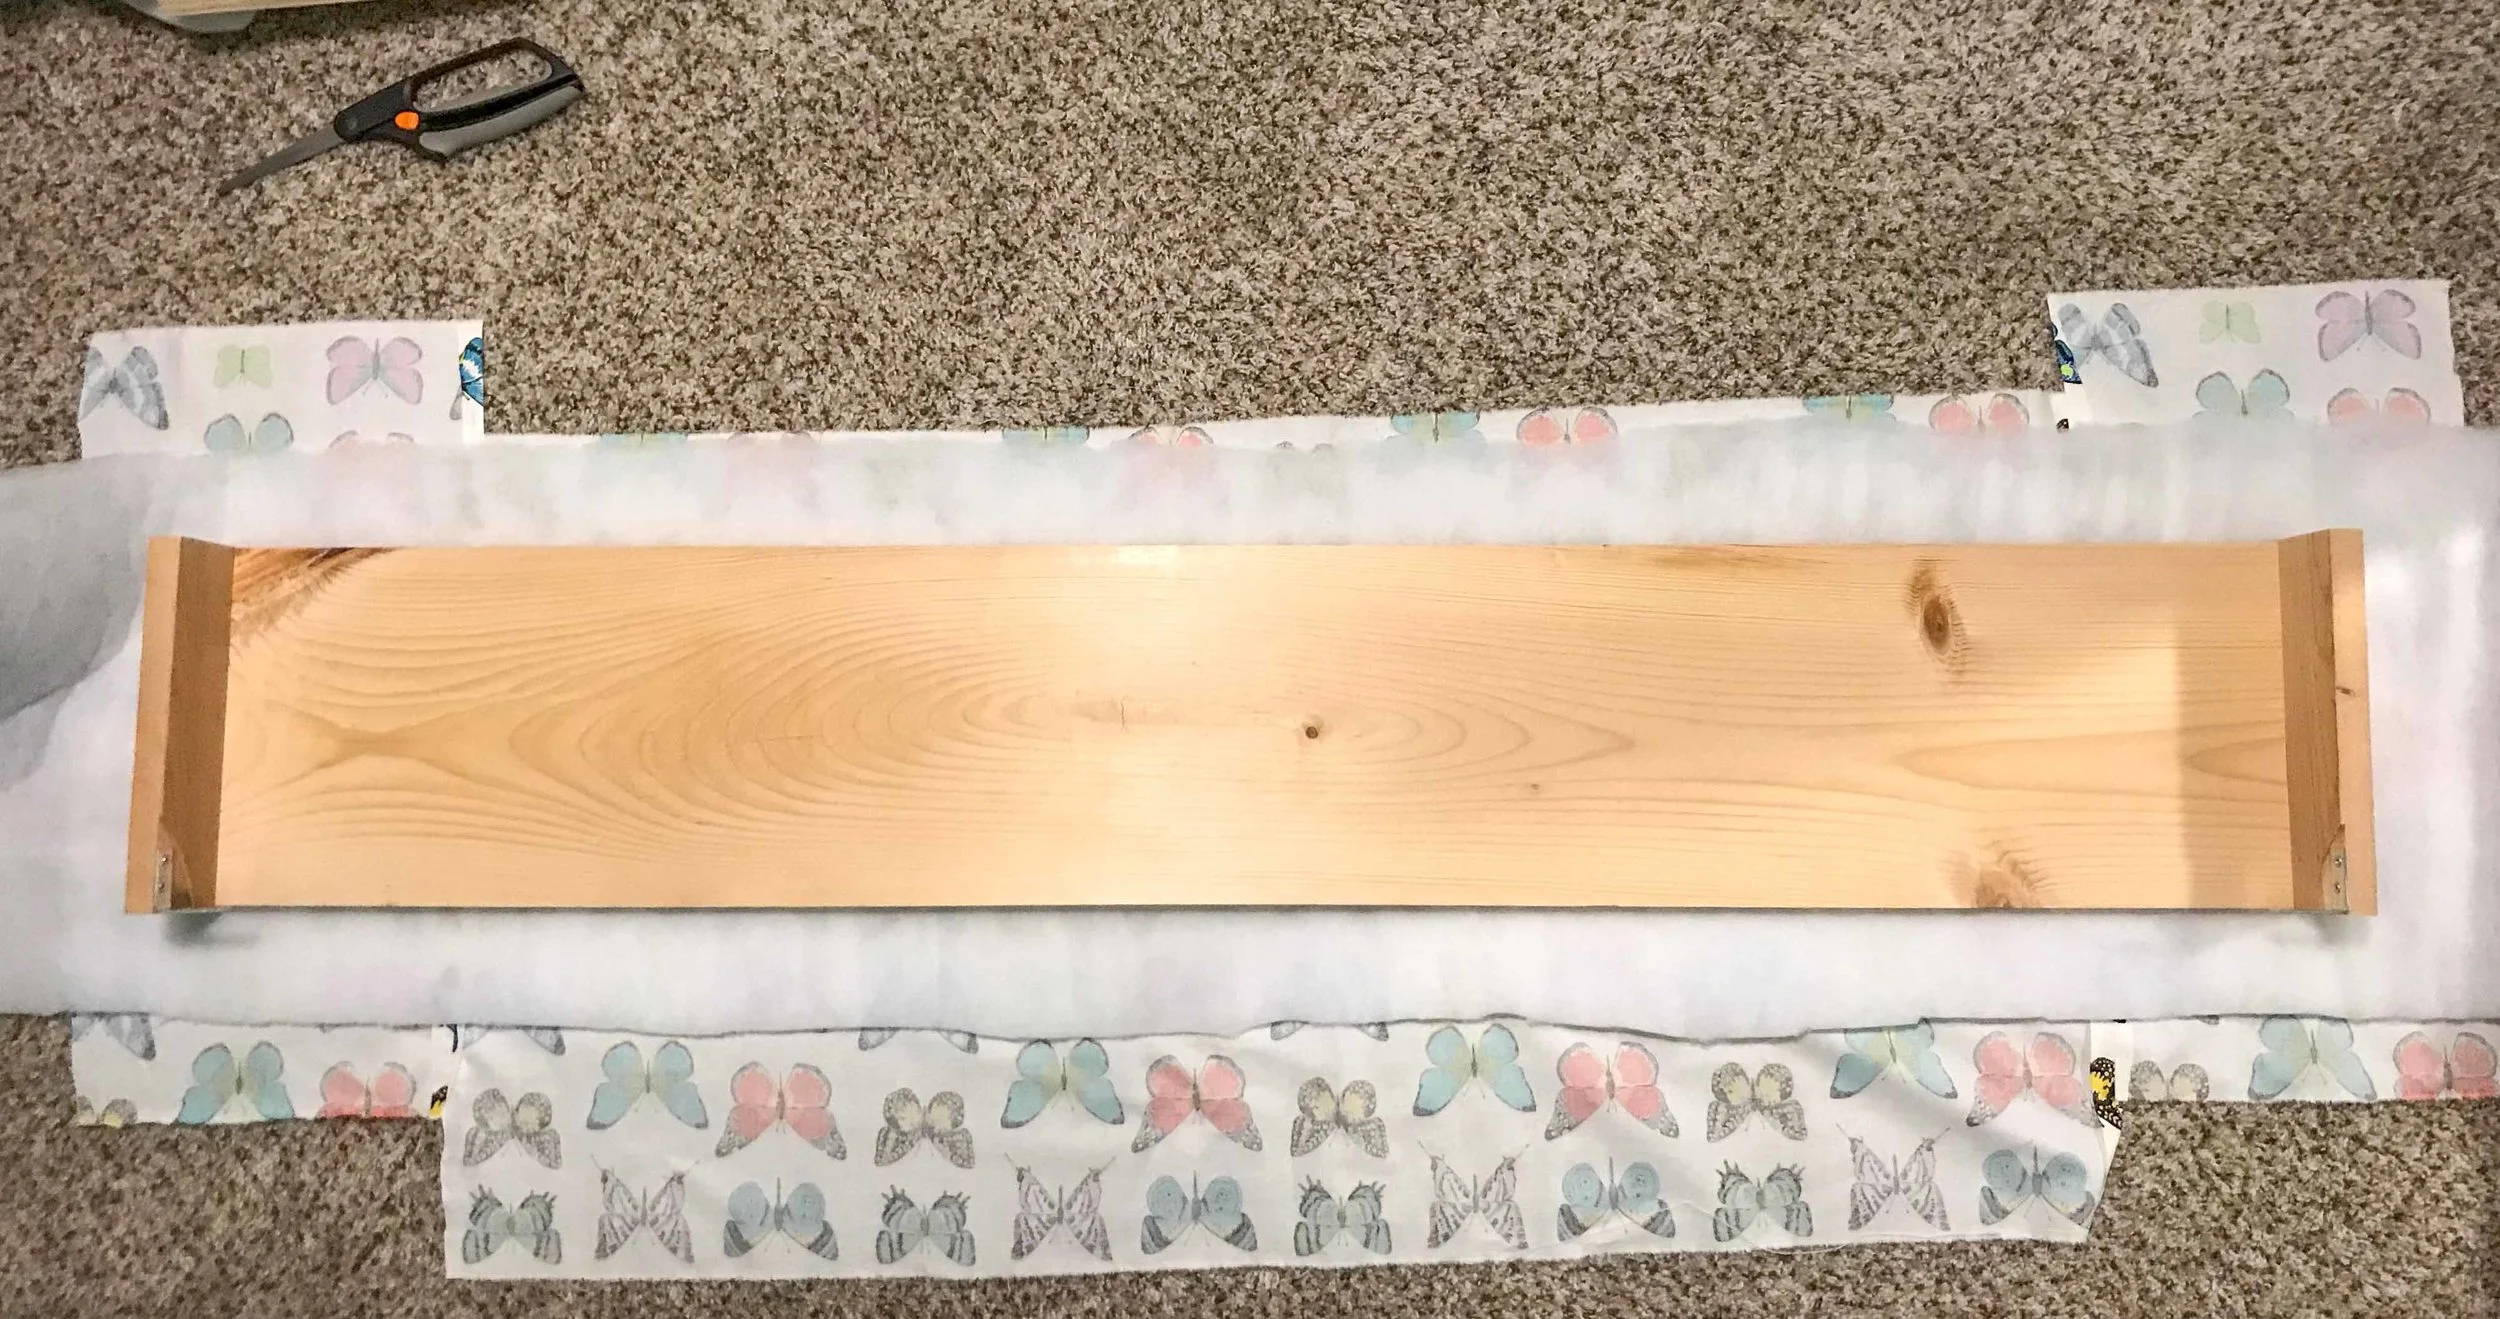
Once the valance is built and brackets are installed, find a nice large workspace where you can lay out your materials. Place the fabric down first — right side down. Then add a layer of batting. Then the valance. Make sure that the top of the valance (where the brackets are installed) is at the top of the fabric. Before you begin stapling, wrap the fabric around and CHECK to make sure everything is facing the right way.
Note: pay attention to the pattern on your fabric. If you have multiple valances in the same room, you will want them to match which means matching up HOW the pattern falls on the front of the valance. For example, on the butterfly valances, the butterflies make a horizontal stripe. I made sure to match up where the butterflies fall on the front and which stripe of butterflies is at the top. See the finished photo below. Even tension along the valance ensures that the stripes of butterflies don’t wiggle, too.
Step 5: Staple it all together
This is a very basic upholstery task, and it is similar to wrapping a gift. The key here is to keep the tension in the fabric even. Work back and forth from one side to the other making sure that you are pulling evenly. If the tension isn’t even, the pattern on the fabric will not be straight. I made a brief video showing how I work when upholstering a valance. The valances in this video are in a different room with different fabric, but they are made using the same technique used on the butterfly valances in the One Room Challenge room.
In this video I simply covered the back of the valance with the same fabric as the front. However, if you are using a different fabric for the backing, move on to Step 5.5.
Step 5.5: Add the Backing Material
If you are going to add backing material, now is the time to do it! Simply cut a piece slightly larger than the back of your valance. Fold the edges under, and staple it into place to hide the raw and stapled edges of the front material. Keep the tension in the fabric as you do this so that it is neat and tidy on the back. You don’t have to worry about the staples, however. No one will be close enough to see them.

From above looking down onto the installed valance screwed in using the L-bracket.

The finished valances in our Guest Room Refresh for the Spring 2019 One Room Challenge.
Step 6: Install
Install any shades, blinds, or drapes first. Then using the L-brackets, install the valances above each window.
In our rooms because the windows have trim around them, each valance is held in place by one screw on each bracket — screwed down into the trim from above. We installed blackout roller shades as well for light control and privacy.
“Customize it! These valances are just the beginning. Add ball fringe or piping or even rickrack. Shape the bottom or the top with a curve. Choose a wild pattern or a soothing neutral. The possibilities are endless!”
This is part of a larger post about the window treatments and lighting choices for the Guest Room Refresh. Check out the rest of this week’s update here:
For more about the Guest Room Refresh and the Spring 2019 One Room Challenge including other DIY projects, check out the ORC page:
Week 3: Lighting & Windows
2019 Spring One Room Challenge: Guest Room Refresh
And for a more romantic, softer approach to window treatments, check out this valance and curtains made from vintage linens:
Sources
Normally I use upholstery fabric for valances. However, I fell in love with both of these patterns — both are high-quality quilting fabrics — and I couldn’t find anything I liked better. Quilting fabric is less-expensive, too. And the finished product is lovely! I buy my fabrics at Elfriede’s Fine Fabrics, but these are available at better fabric stores around the world.


