
I sometimes struggle to know what to give my mother and my grandmother. Gift giving for them can be difficult. But last year I made them a gift which I think they both truly enjoy. I created tea towels using some artwork I created and the technology at Spoonflower. I am so pleased with how they turned out, and this process can easily be used to create tea towels with a child’s art, too. It isn’t hard, and the end result exceeded my expectations.
Choose Your Artwork
I have seen tutorials for making tea towels using treasured, handwritten recipes. Those are lovely, and this tutorial follows those same basic pattern. So if you want to use a family recipe, great! Do it!
I also used a family recipe, but with a twist. I follow several watercolorists on Instagram, and last fall I was working my way through some of @DearAnnArt ‘s Autumn Challenge. One of her assignments was to illustrate a fall recipe. Our family has a very old and beloved recipe for Pumpkin Pie, so I chose to illustrate this for my assignment.

I loved this assignment! And I did it several times before I felt I had just what I wanted.
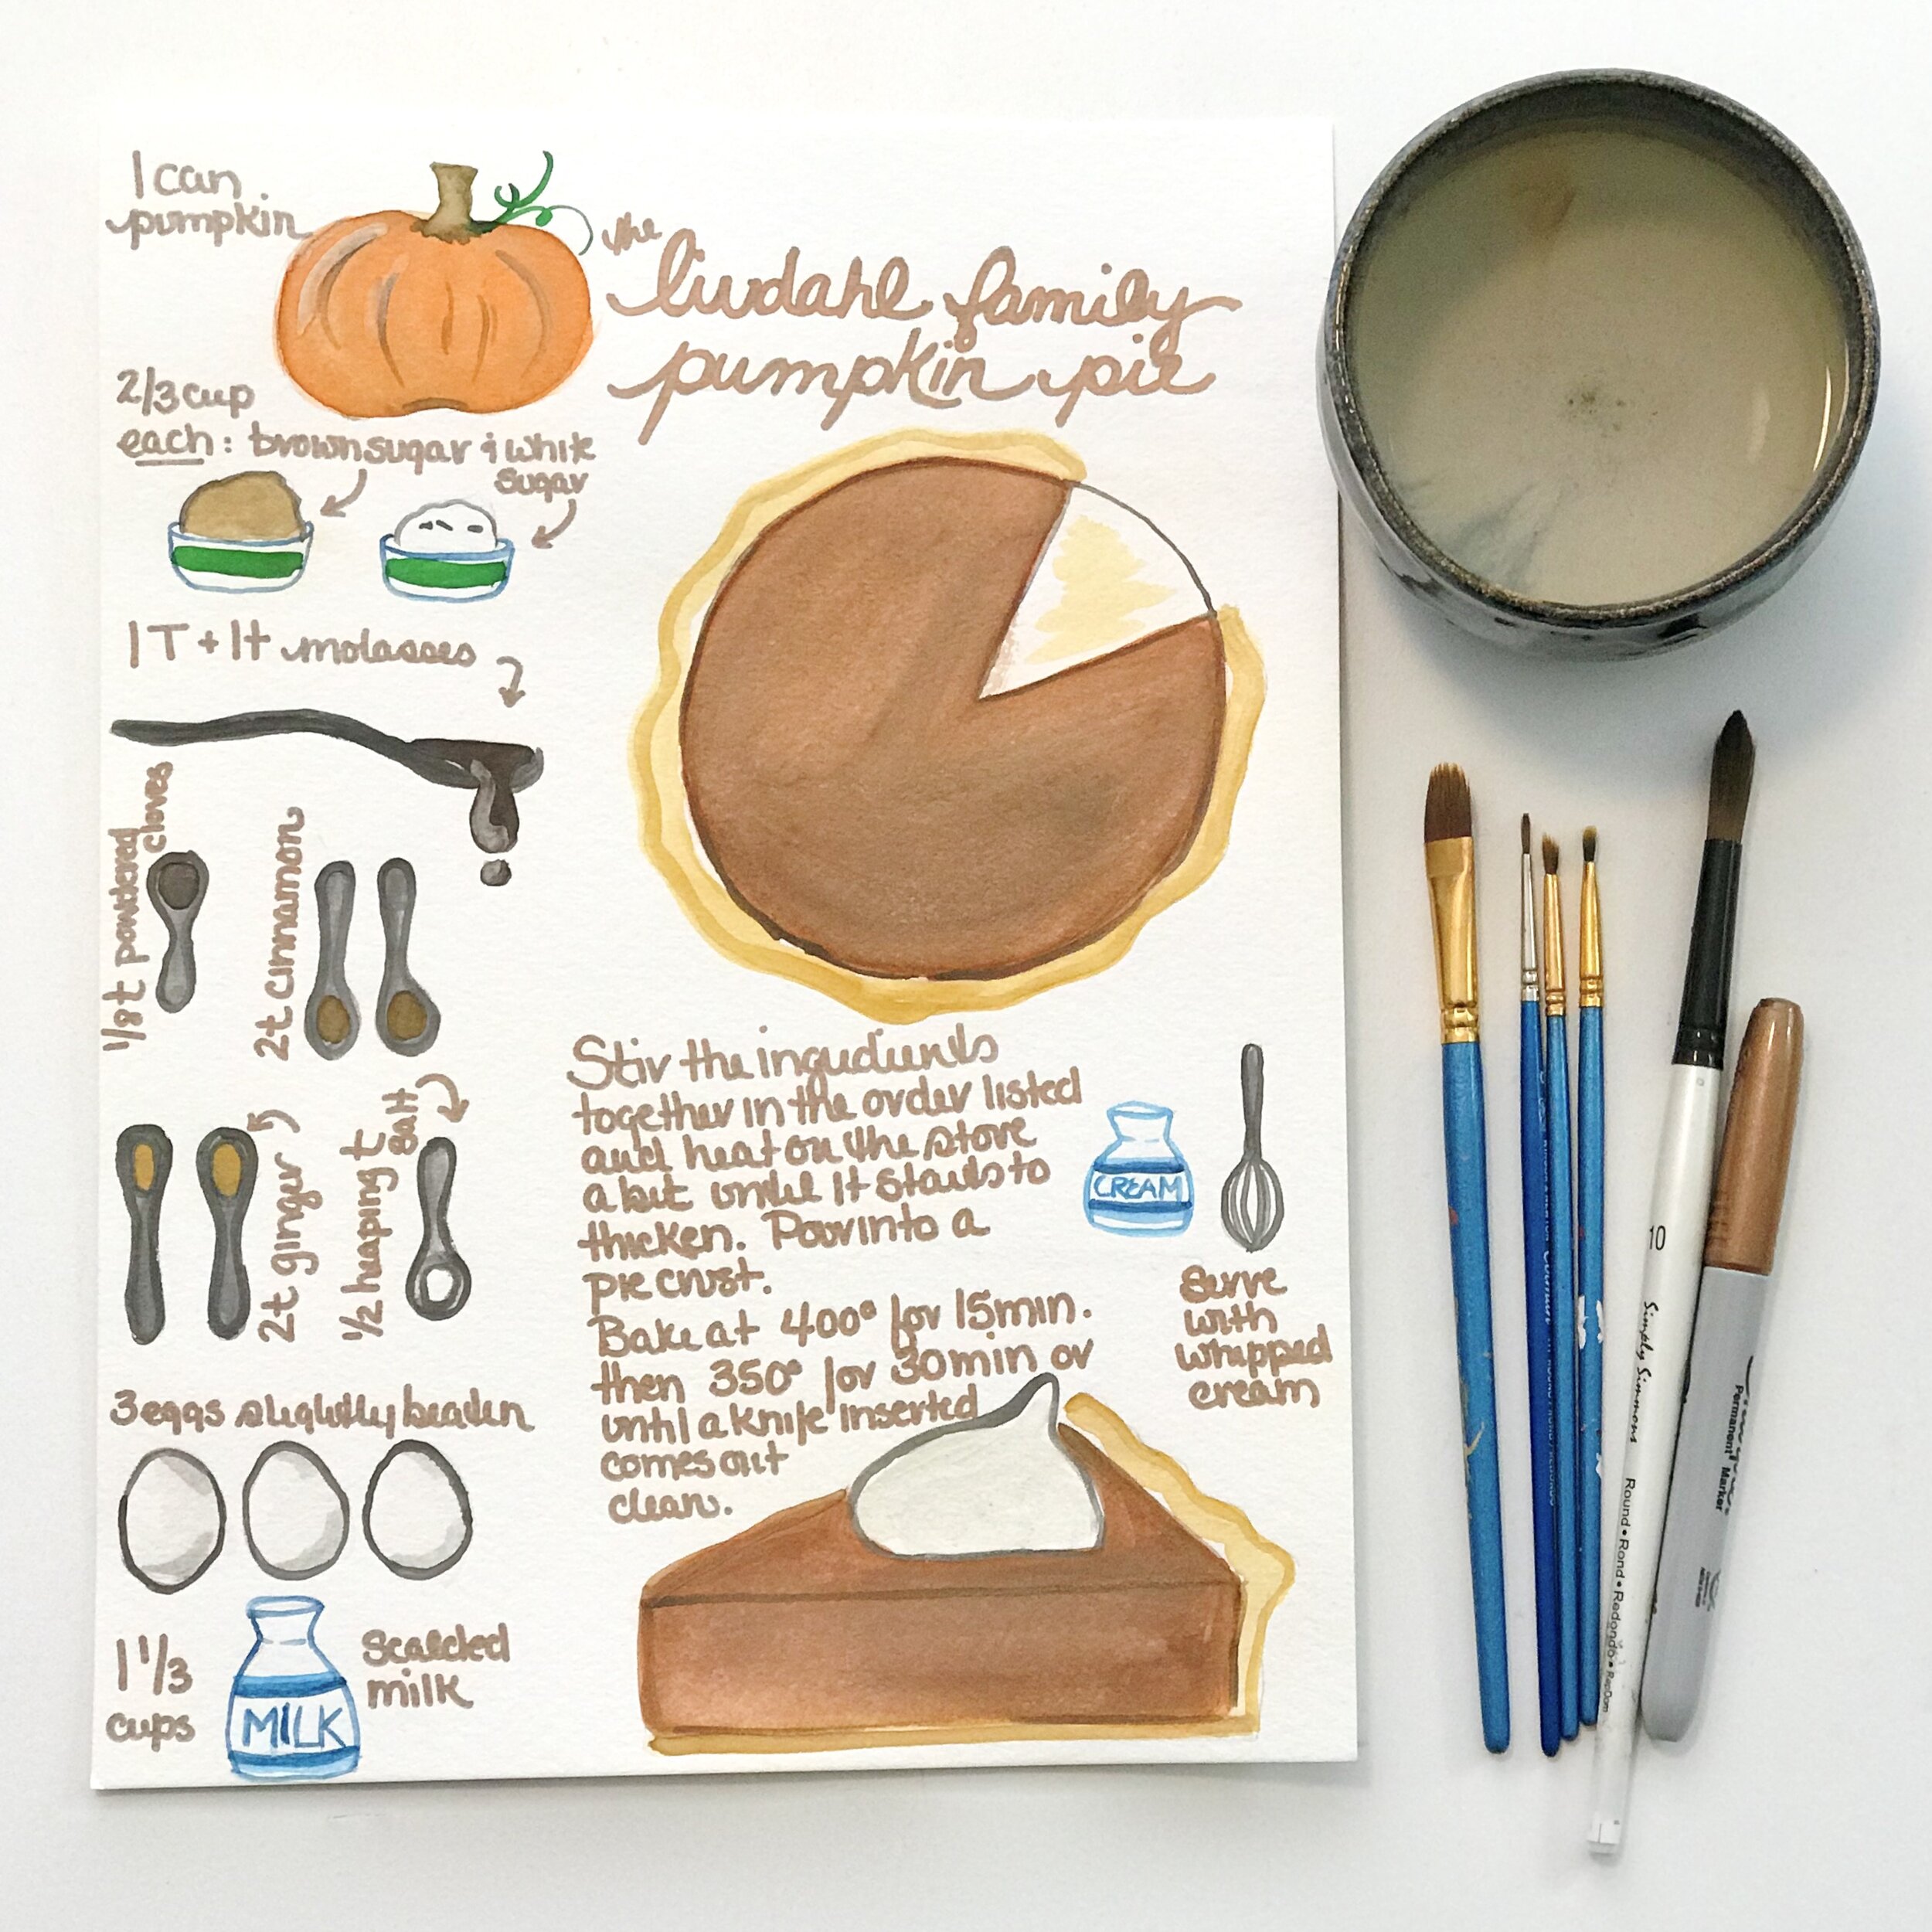
Here’s my final attempt at illustrating the pumpkin pie recipe.
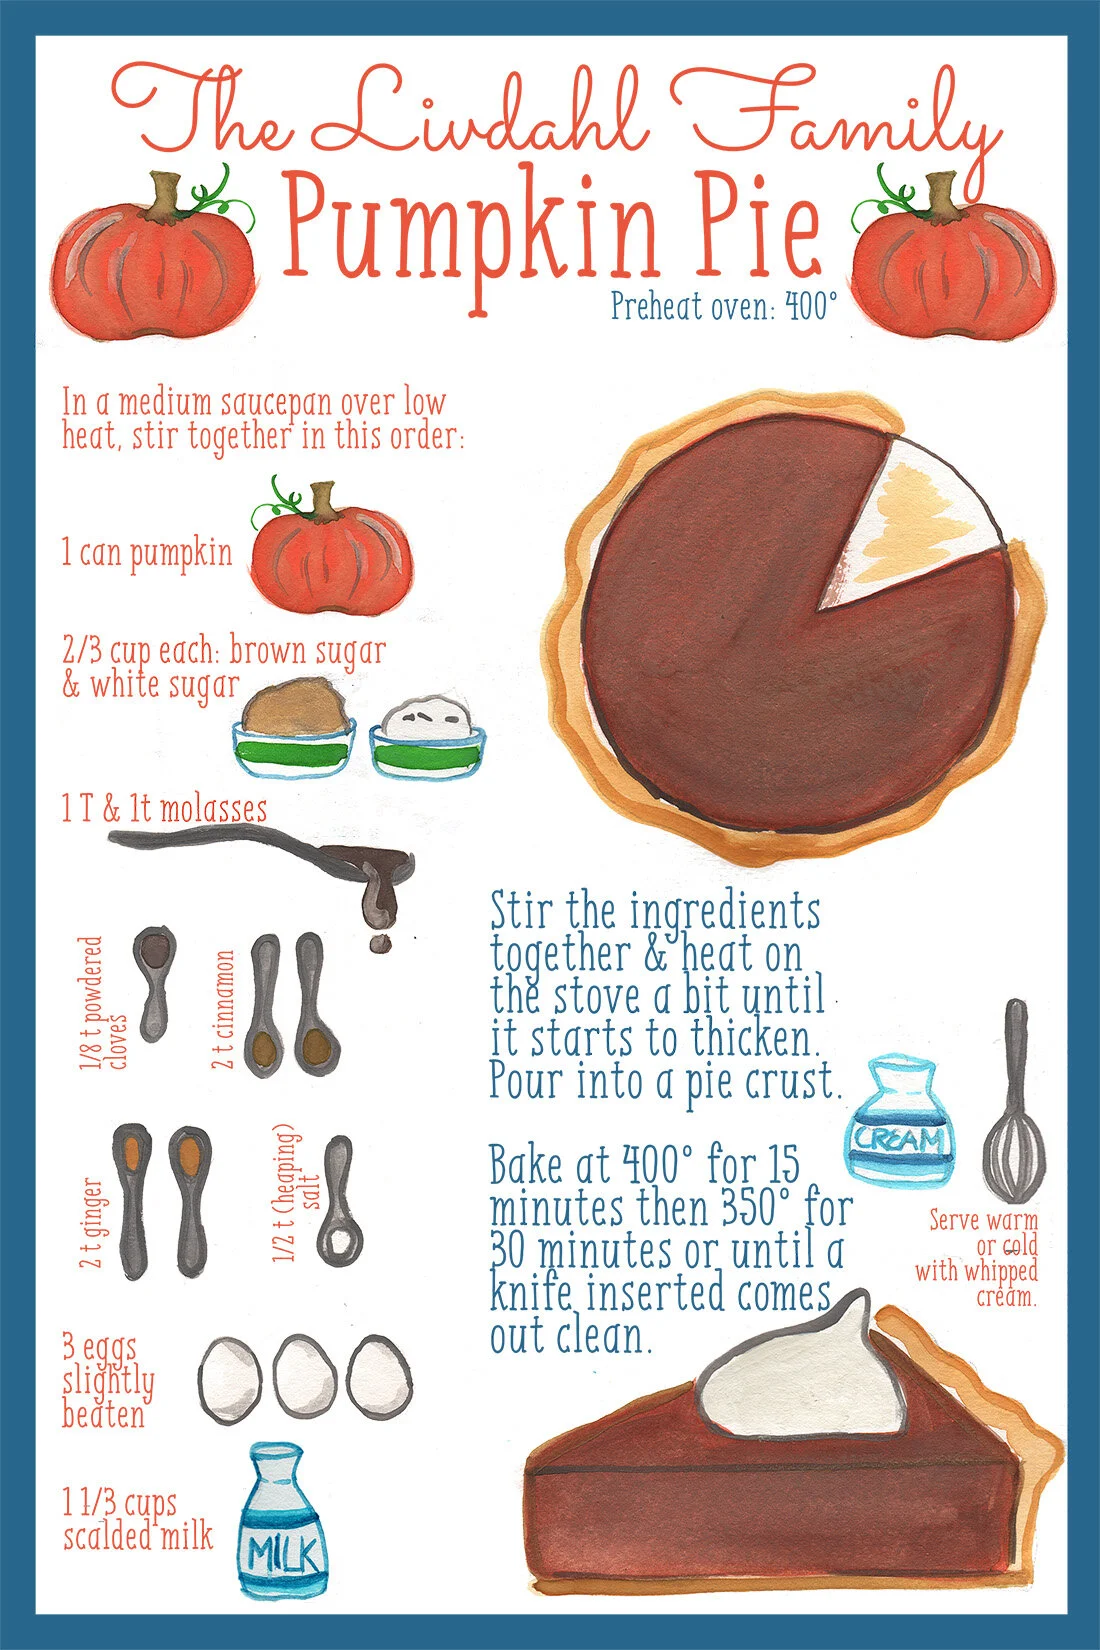
However, I wasn’t happy with my hand lettering, and at some point in the painting process I had decided to turn this into a tea towel, so when I had a version I was happy with, I scanned it at a high resolution and imported it into Photoshop.
You don’t have to use Photoshop to make this project work! But I do, so I replaced my hand-written wording with type. I also added a border around the recipe. One of the other tutorials I read recommended that doing so makes hemming the tea towel easier. I am glad I did this, so I do recommend adding a border to your image in the tutorial below. There are several ways to do this with or without Photoshop.
Whatever artwork you are using, there are two ways to approach this project: with or without Photoshop. Either way is fine! If you use Photoshop, you’ll do the editing first and then upload the image. If not, you’ll edit at PicMonkey.com.
Directions if you are using PHOtoshop
Scan Your Artwork
You need a really good image to begin with, so use a scanner and scan at 600+ dpi — the high/best resolution settings. If your file size is too big, you can always go smaller later, but you want to get clarity and definition.

Resize your Photo & add a Border
Whatever program you use, you need to end up with an image that is 18” x 27”. Usually, but not always, a tea towel is in portrait orientation (vertical, not horizontal), but that is a matter of personal preference.
I added a blue border to my image which was helpful for two reasons:
You need a buffer around your artwork so that you can hem the fabric.
The color made for a crisp line for hemming. But your border doesn’t need to be a contrasting color. It could be white or whatever your base color is.
Final file size: 40MB (150 DPI recommended)
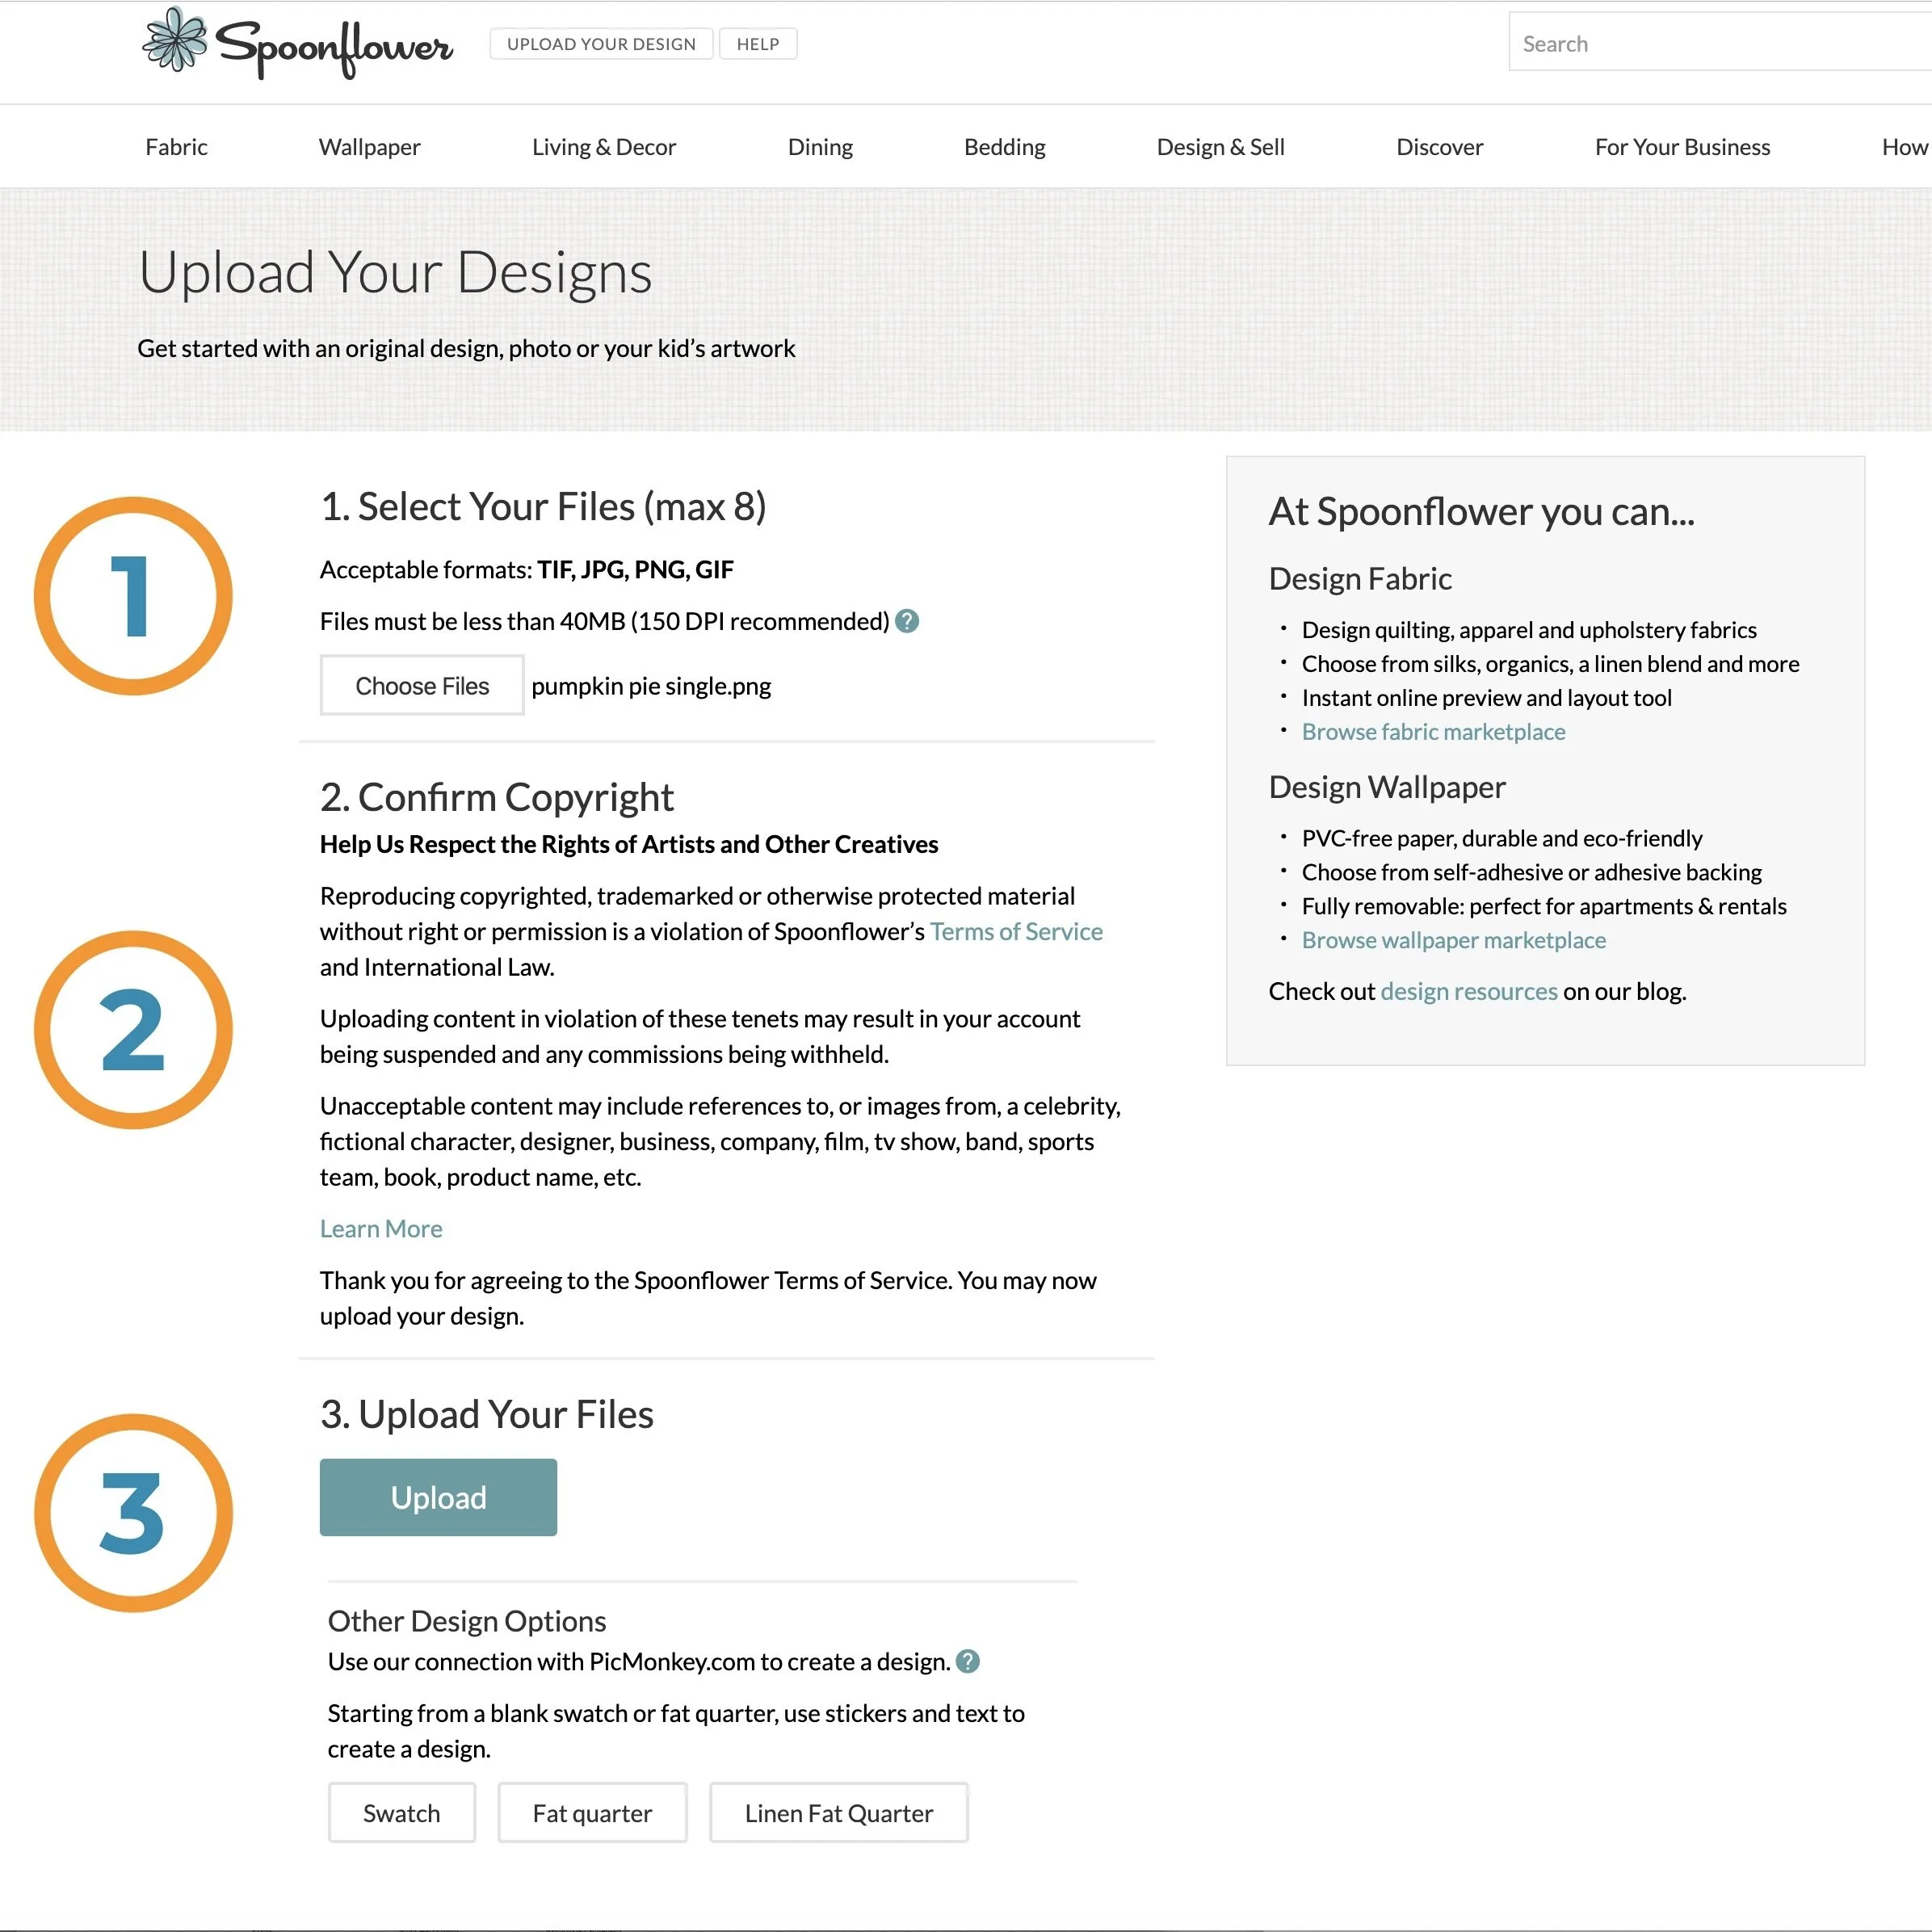
Upload Your Image
Go to the Spoonflower website and click Design & Sell -> Upload Your Design.
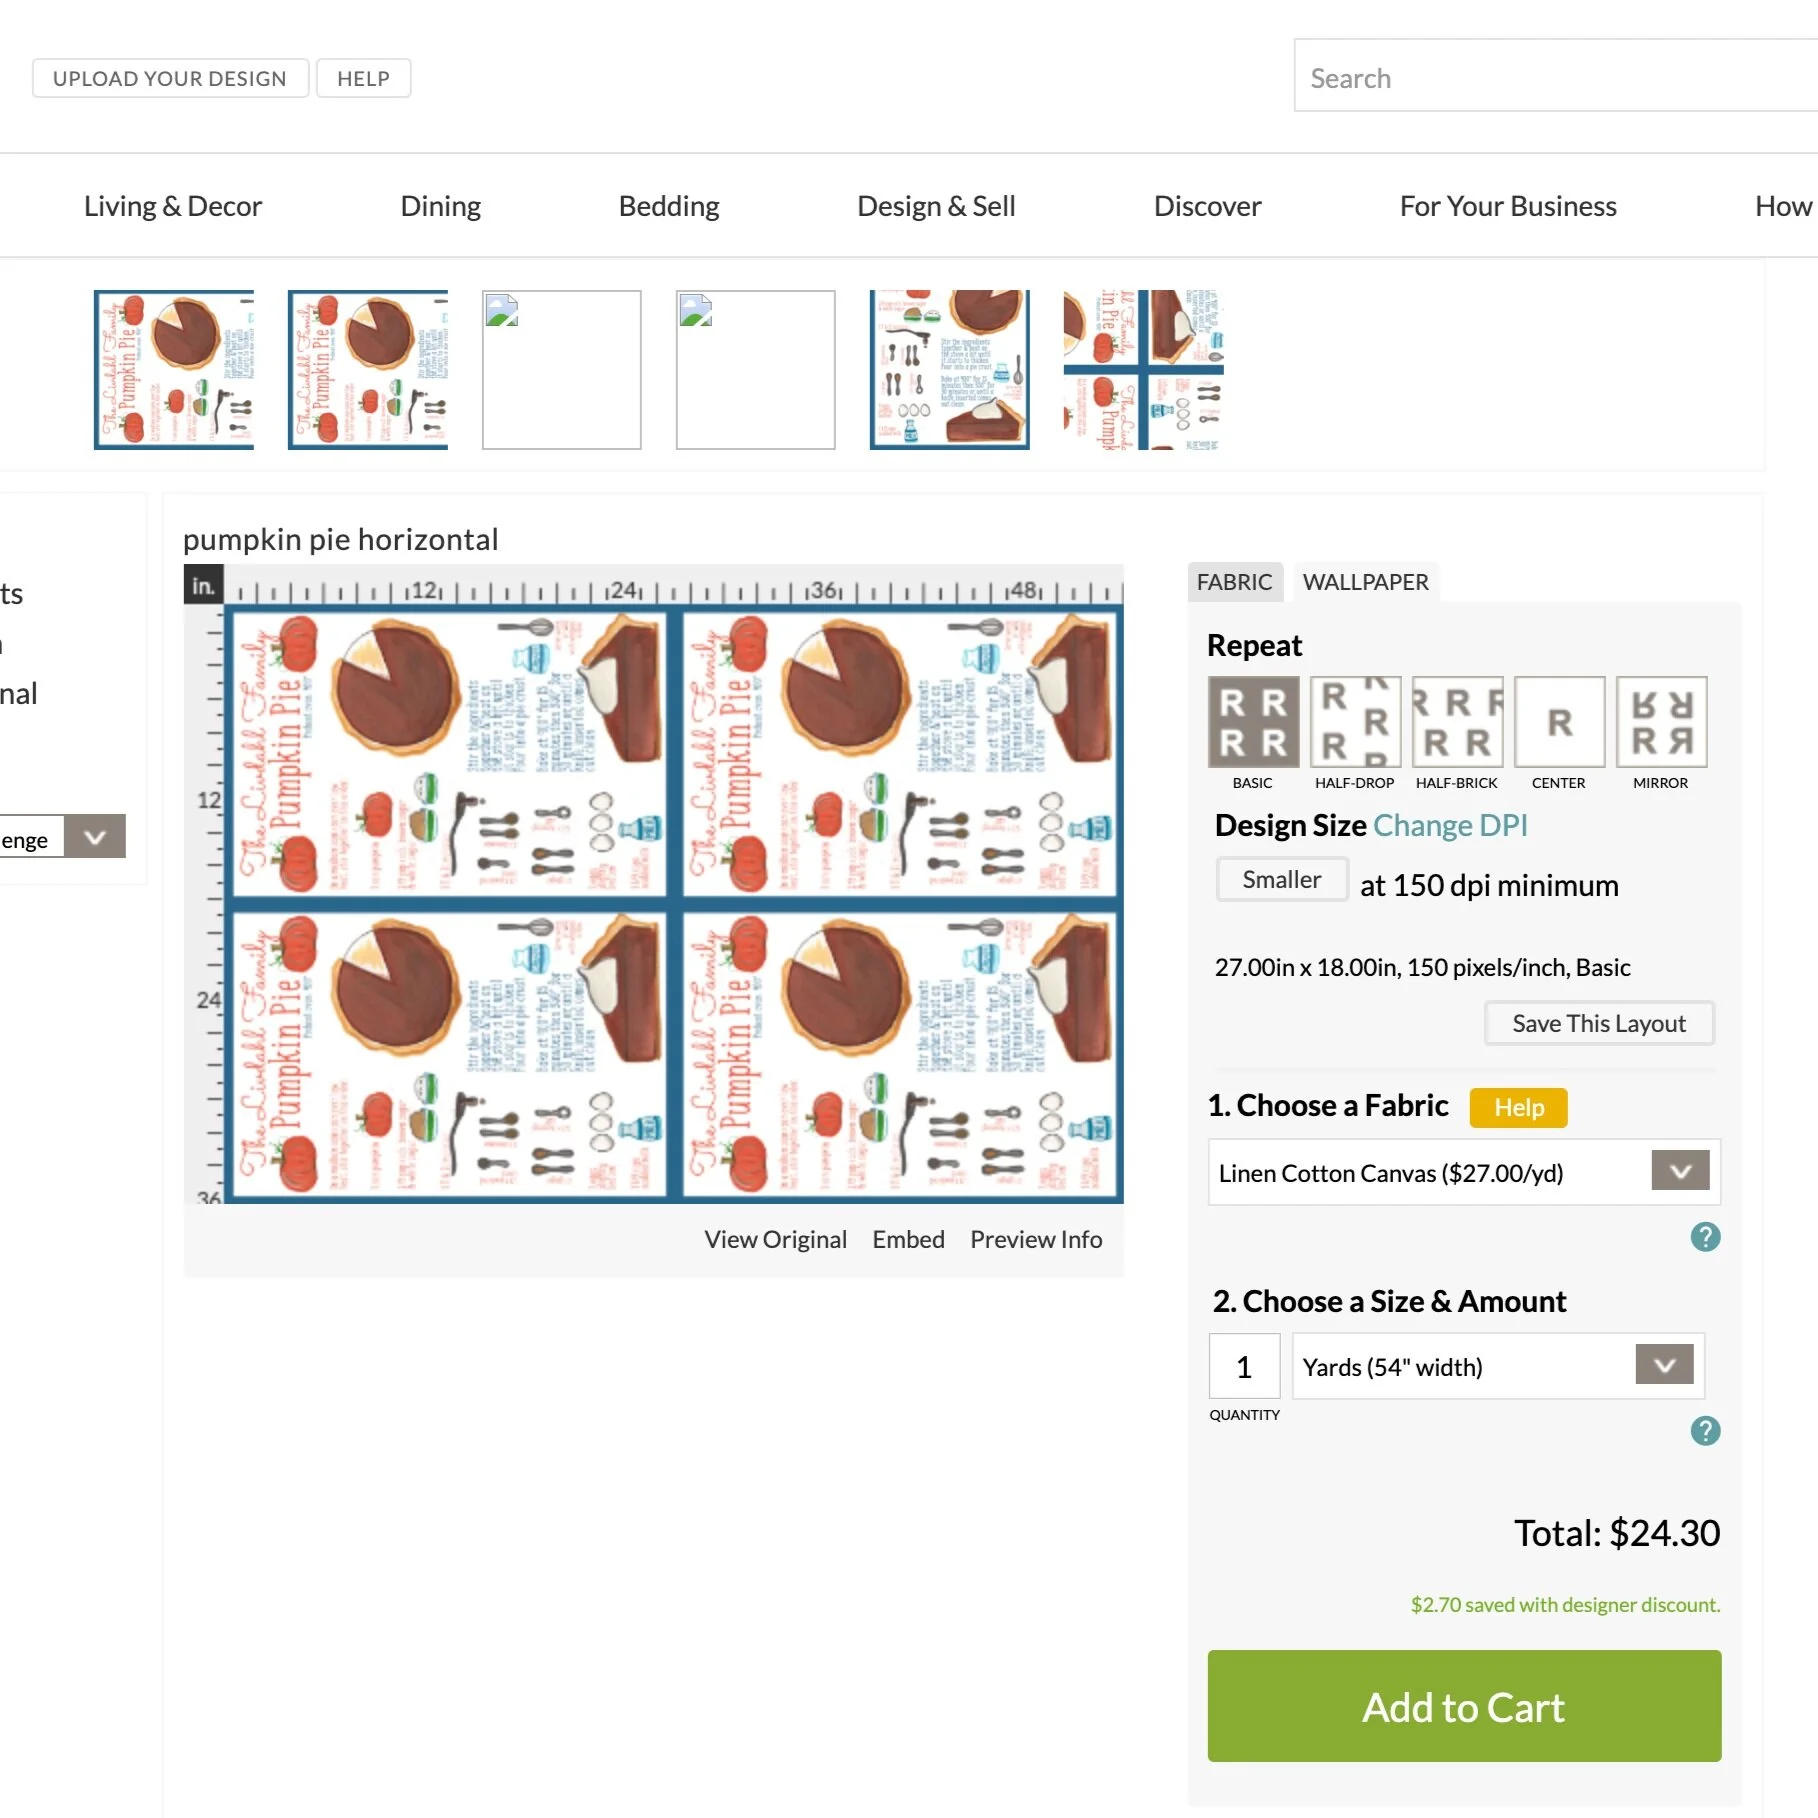
Choose Your Fabric and Yardage
Linen Cotton Canvas is the best fabric for tea towels. To make one tea towel choose a Fat Quarter. Otherwise, each yard will make 4 tea towels.
Place your order.
NOTE: Because I was unsure about the richness of my colors, I ordered a test swatch before committing to a whole yard of fabric. This is a matter of personal preference, however.
Directions Without Photoshop (using PicMonkey)

Scan Your Artwork
You need a really good image to begin with, so use a scanner and scan at 600+ dpi — the high/best resolution settings. If your file size is too big, you can always go smaller later, but you want to get clarity and definition.
Final file size: 40MB (150 DPI recommended)
Use your scanner software or a photo-editing program of your choice to make sure the colors are accurate and that the design looks just as you want it to be.
If you can add a border in your photo editing program, do so. If not, follow the directions to use PicMonkey.

Log in & Upload Your Image
Go to the Spoonflower website and LOG IN or create an account. The options outlined in this process are NOT available unless you are logged in.
Click Design & Sell -> Upload Your Design.
Upload your image.
Confirm your copyright.
If you have already added a border:
Click Upload.
If you still need to add a border:
Under Other Design Options, choose Linen Fat Quarter. This opens the free tool PicMonkey. If you are working on a Mac, you’ll have to download the tool.
Follow the directions in PicMonkey to add a border. Spoonflower provides this full tutorial to use the PicMonkey tools.
Choose Your Fabric and Yardage
Linen Cotton Canvas is the best fabric for tea towels. To make one tea towel choose a Fat Quarter. Otherwise, each yard will make 4 tea towels.
Place your order.
NOTE: Because I was unsure about the richness of my colors, I ordered a test swatch before committing to a whole yard of fabric. This is a matter of personal preference, however.
How to Make the Tea Towels
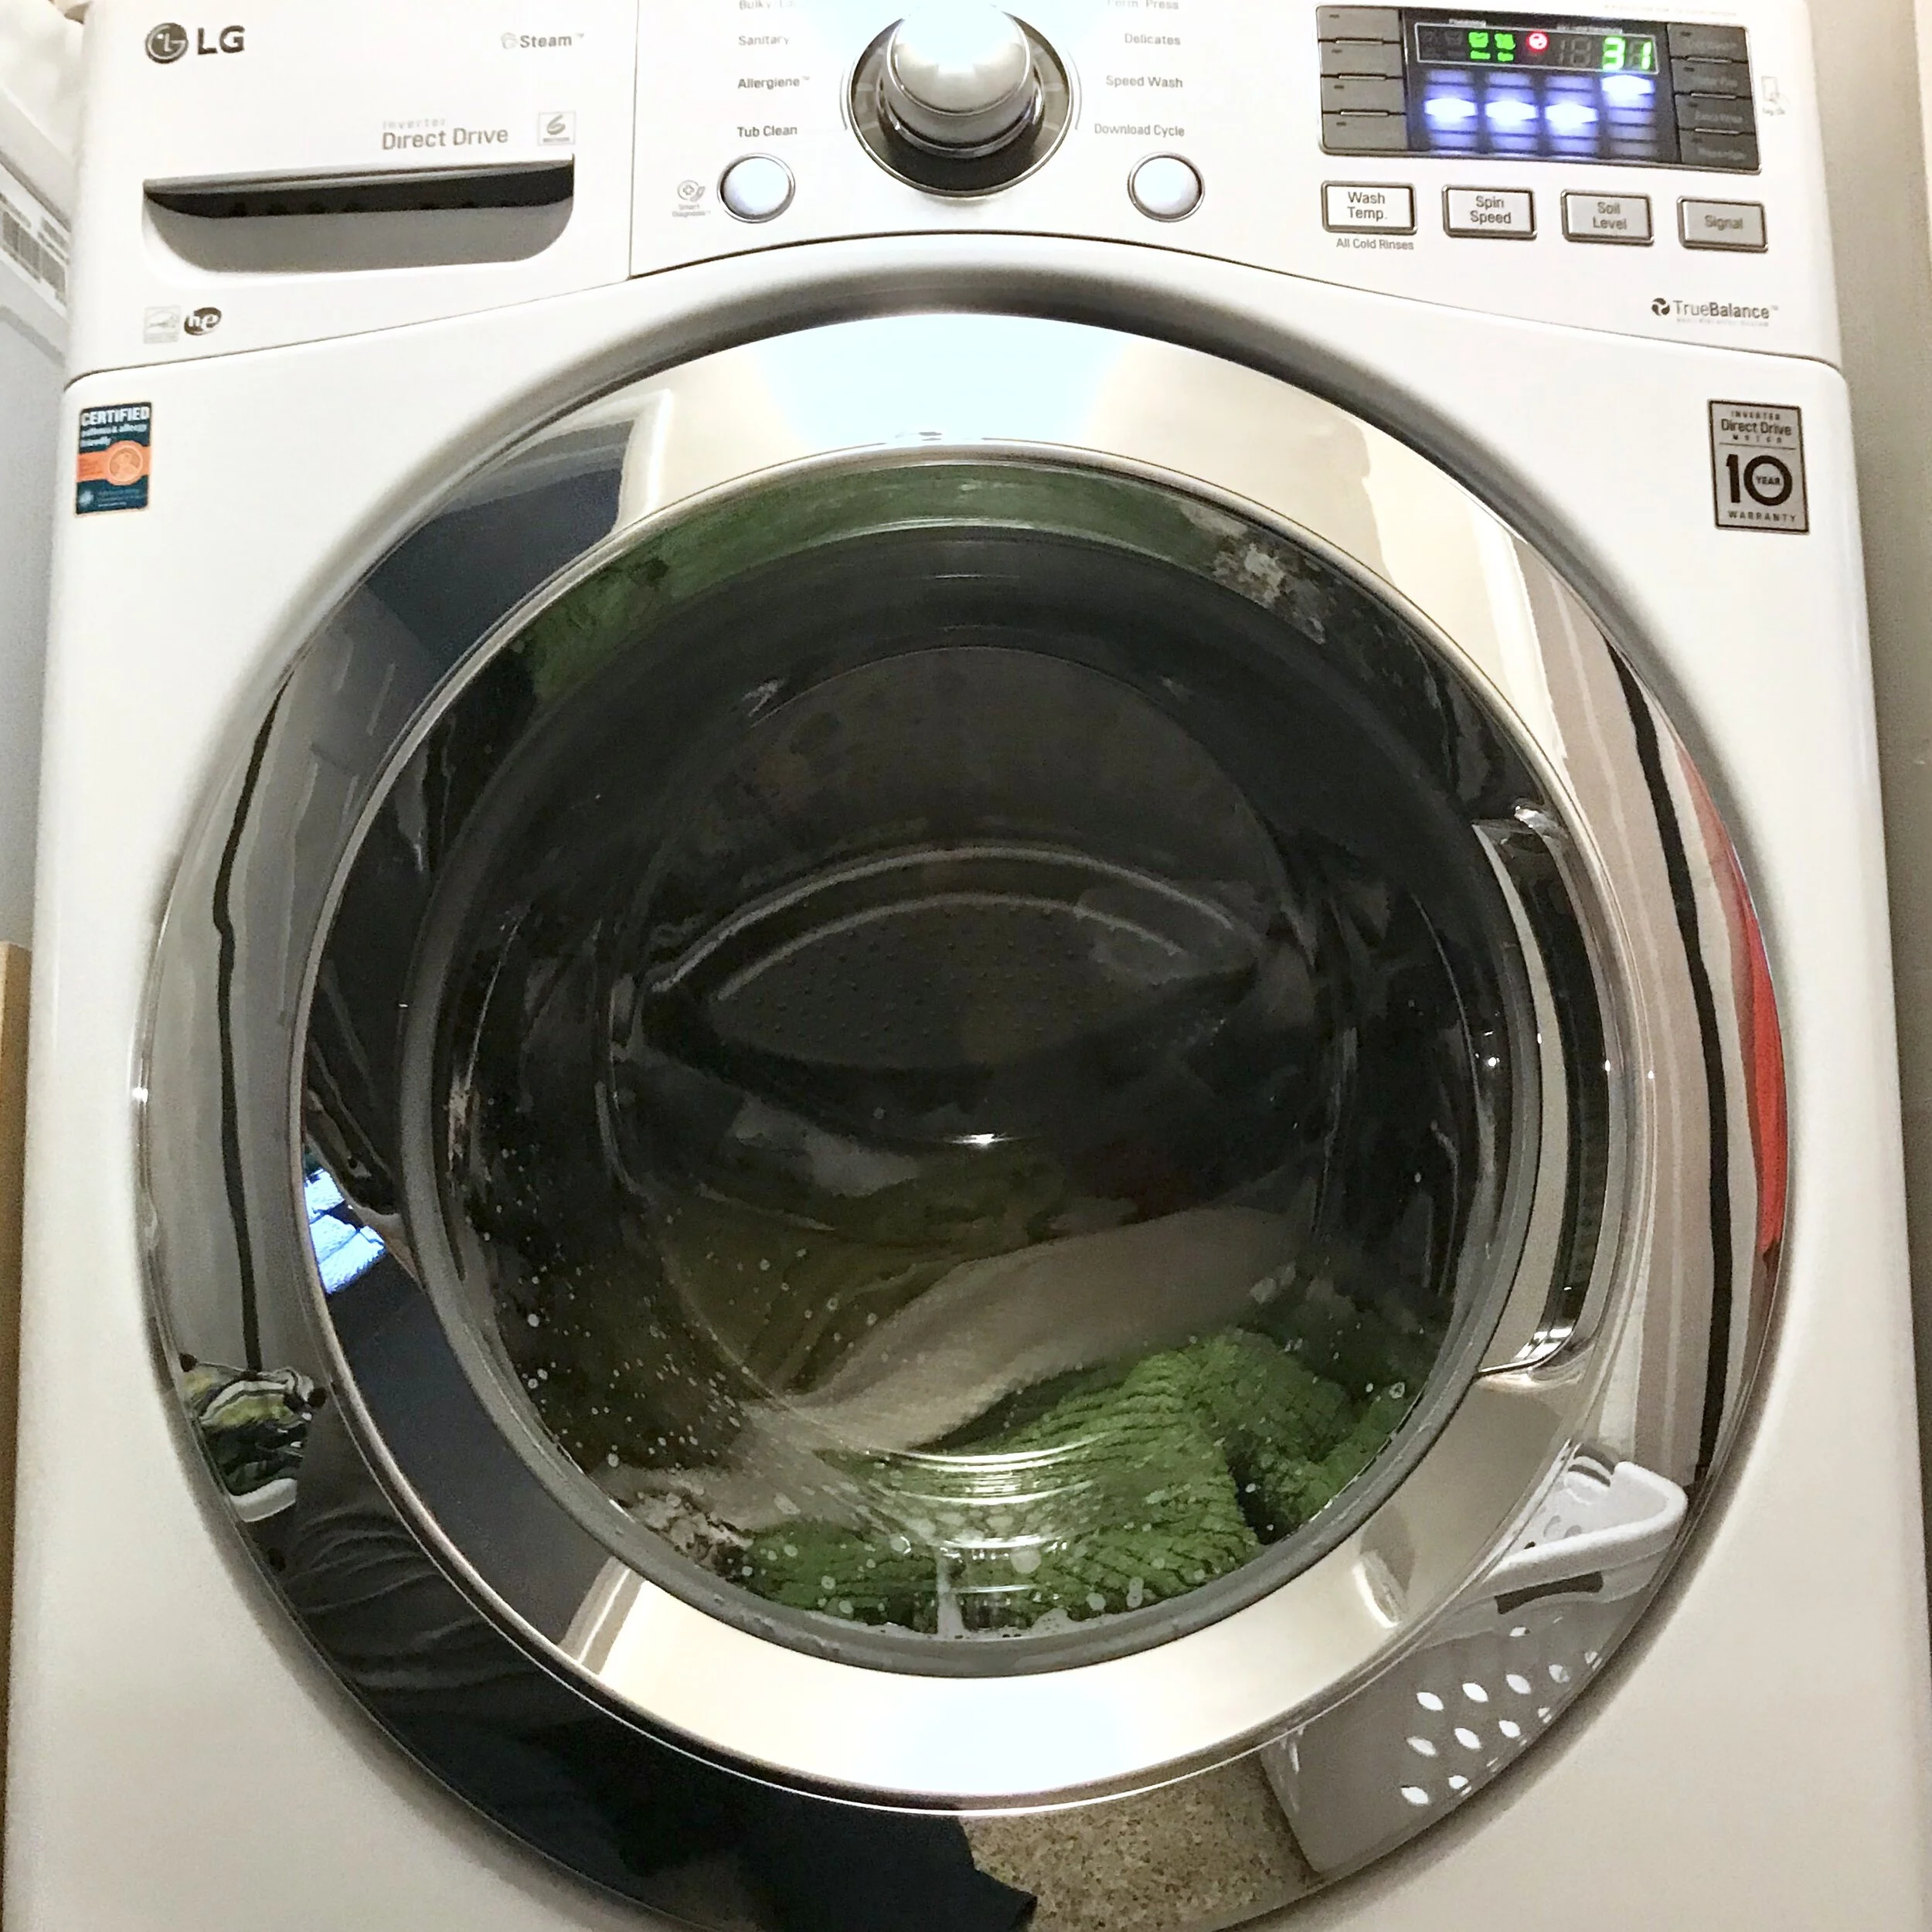
Wash, dry, & Iron Your yardage
Always wash and iron your fabric before sewing. This removes any sizing from the fabric, and keeps wrinkles from causing problems when sewing.
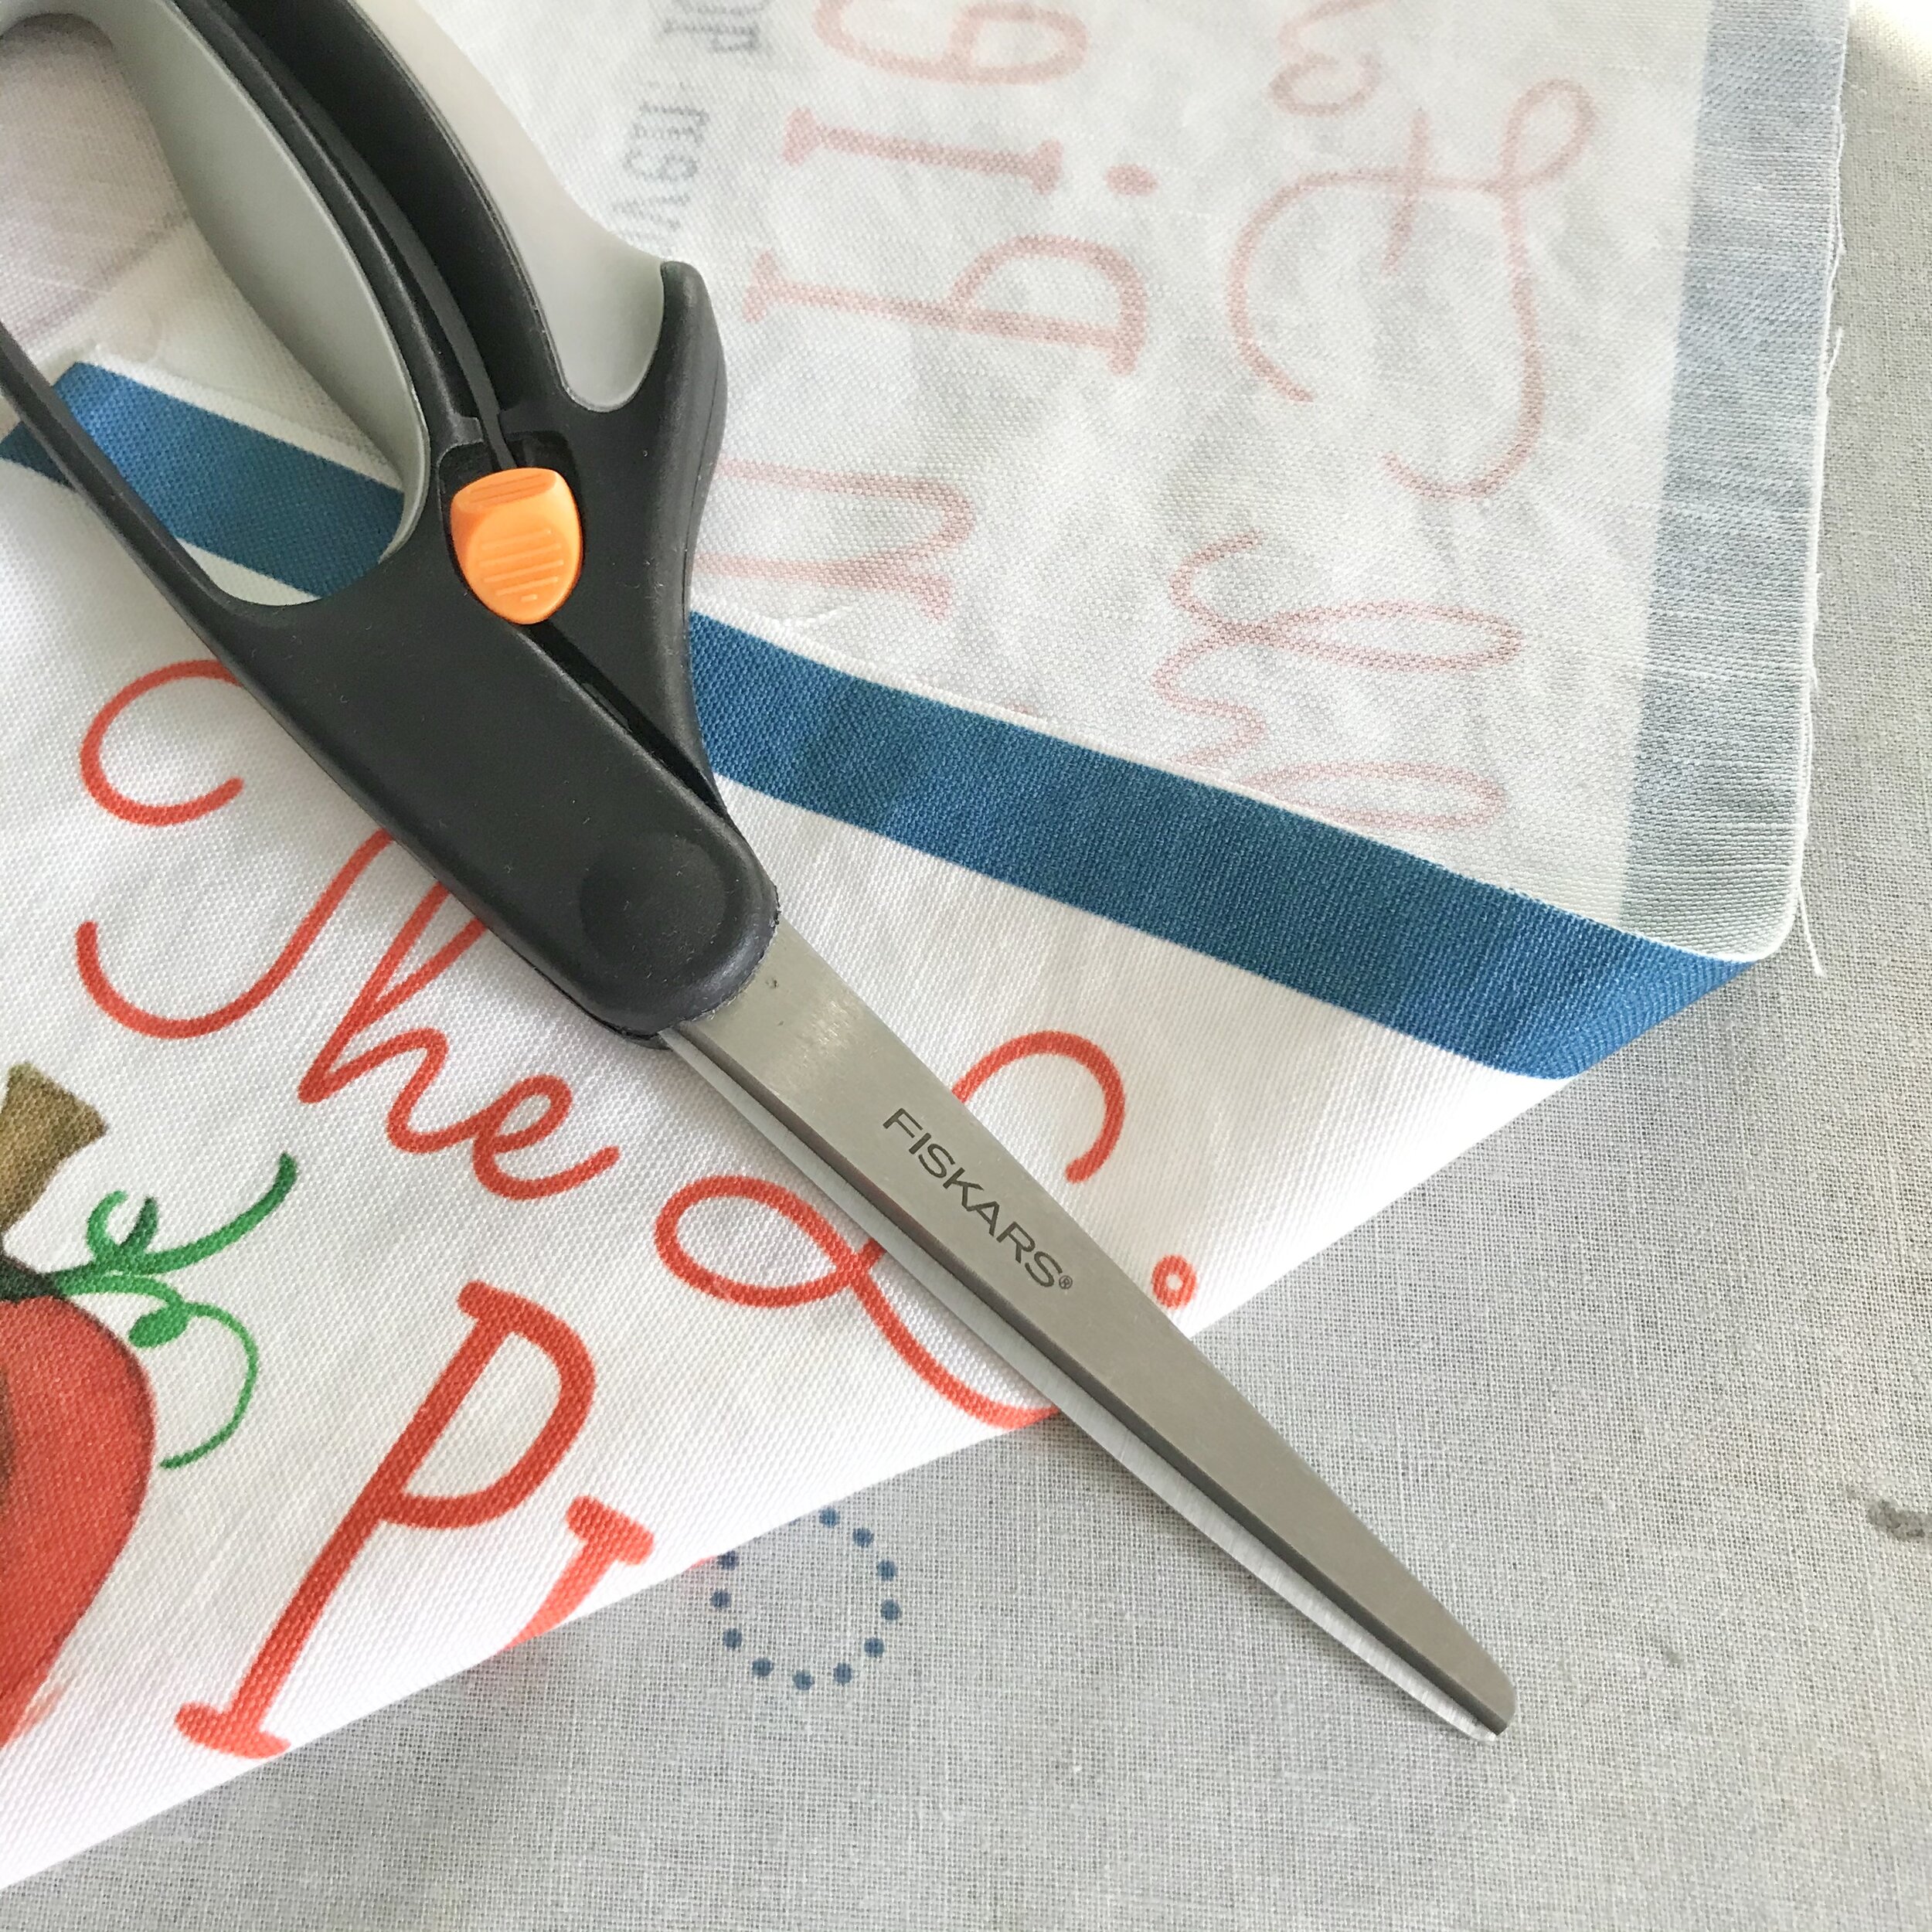
Cut your towels apart
If you ordered more than a fat quarter, cut your fabric into separate panels. In my case, I ordered 1 yard, so I made 4 tea towels.
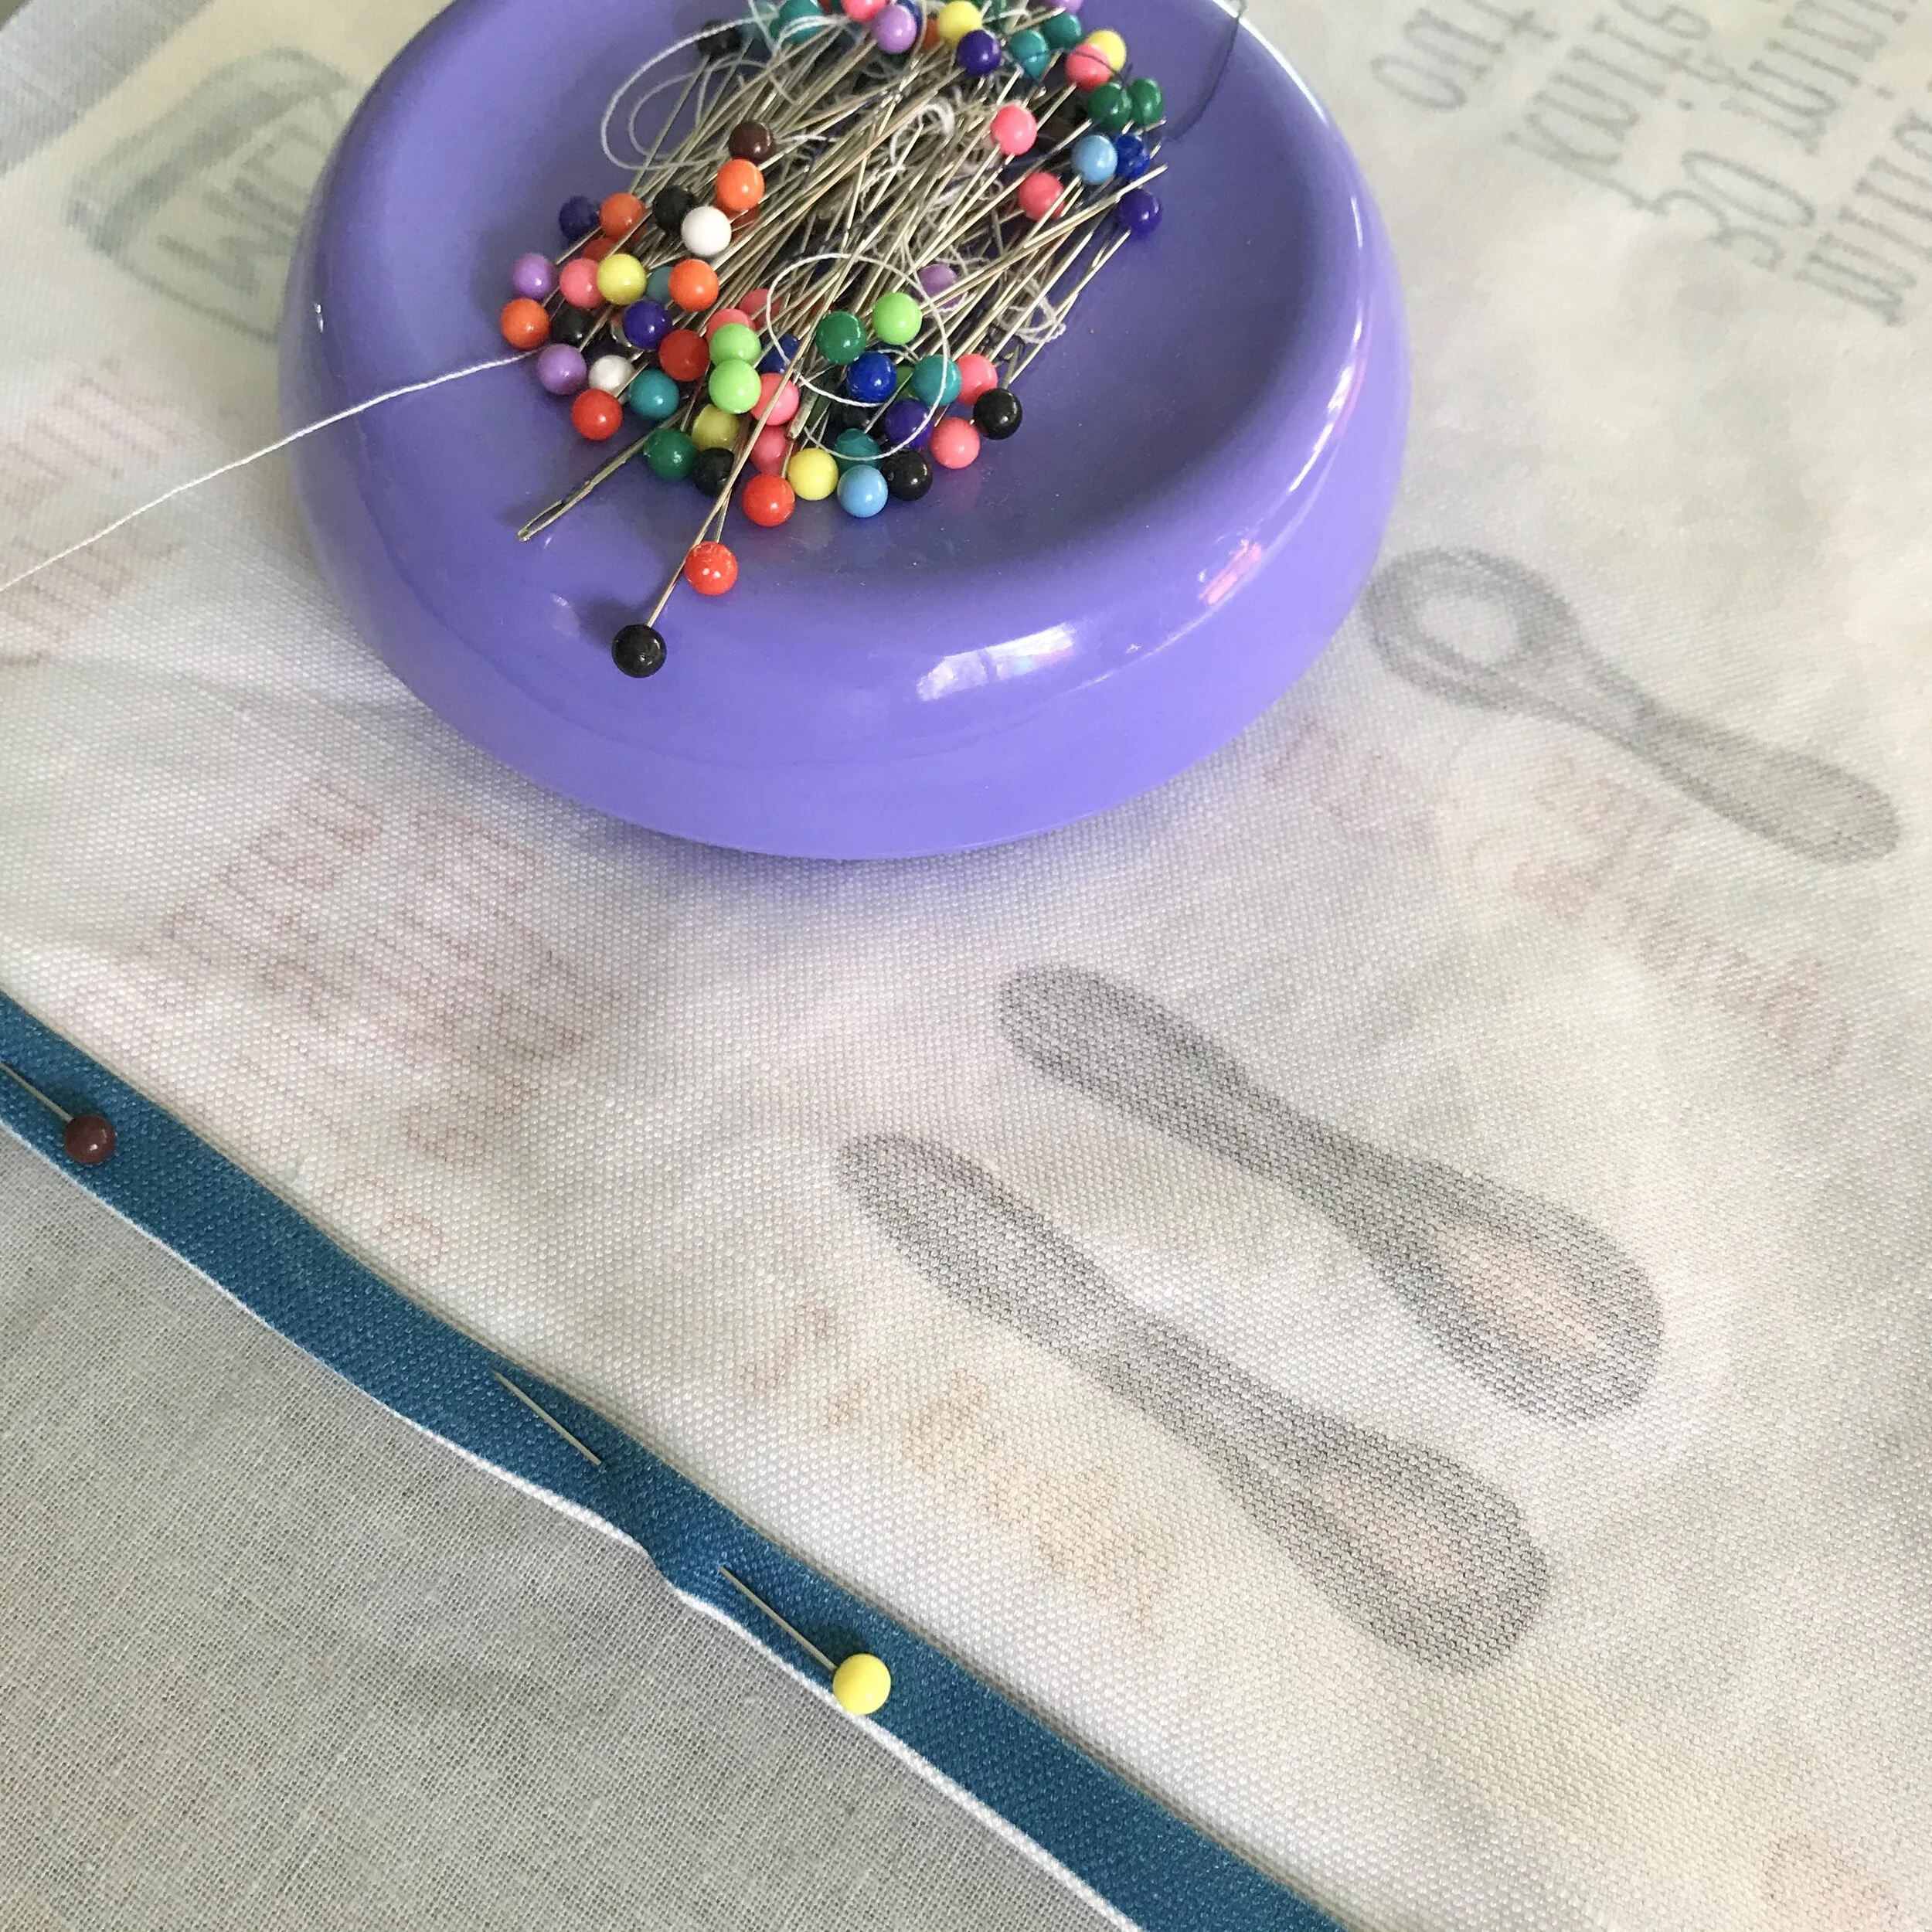
Pin and Sew
Iron and pin under the hems. I added a length of white ribbon under one corner of each towel as a hanging loop. Then stitch all four seams.
Enjoy your beautiful tea towels! And tag me (@midmodernmama) when you make them. I would LOVE to admire your work!
