How to Create Season Extenders for Year-Round Gardening
Last fall, I embarked on a little experiment that turned into a whole new way of gardening. I wanted to see if I could grow some leafy vegetables through the winter. With a bit of planning and creativity, I was able to grow greens from October all the way to April—and I'm still using the season extenders today in the peak of summer! In this post, I’ll show you how you can create your own season extenders to extend your growing seasons all year long — they are so much better than polytunnels!
I harvested these turnips in January!

If you're looking to extend your gardening season, season extenders like DIY polytunnels are a game-changer. Building a DIY polytunnel for your garden can provide an affordable and effective greenhouse alternative, allowing you to grow crops year-round, even during colder months. Whether you're a beginner or an experienced gardener, creating your own polytunnel can be a rewarding project. In this guide, we’ll explore step-by-step instructions on how to build a polytunnel, the best materials for durability, and tips for maintaining it long-term. Learn how to use a polytunnel to extend the growing season for vegetables, maximize your garden’s potential, and make the most of your growing space in winter. Discover the top benefits of using DIY polytunnels, and get inspired with affordable ideas for constructing your own season extender to keep your garden thriving throughout the year.
Why Use Season Extenders?
If you’re in a region with a temperate climate, you may wonder why season extenders are so important. Well, here are a few reasons why they’re a must-have in many gardens:
Cold Protection: Season extenders help you keep plants alive longer into the fall and even through the winter months. This can be very helpful with early frost and freezes as well as late-spring cold snaps.
Heat & UV Protection: In places like Colorado, where I live, the intense sun and dry conditions can damage plants. Season extenders can provide shade and protection against the harsh UV rays which is particulalry helpful for tender seedlings and plants that are quick to bolt like lettuces.
Early Starts in Spring: I also use my season extenders in the spring to warm the soil and start my seeds earlier, giving me a head start on the growing season.
Protection from Hail: In areas prone to hail, season extenders can protect delicate plants from sudden storms.
In my case, I garden in a raised bed at around 5,600 feet in altitude in Colorado. This means we experience extreme cold winters and scorching summers, which can be challenging for growing. Season extenders have helped me overcome these challenges and extend my growing season from early spring until late fall (and sometimes beyond).

Season extenders over these raised beds allow me to grow all winter.

Protecting lettuces from the heat in August keeps them from bolting.


What do you Need to Build a Season Extender?
Creating your own season extenders is surprisingly simple. Here’s what you’ll need:
Aluminum conduit (about 18 inches long for each corner)
Fiberglass tent poles (easily found in sets online)
Zip ties
Large binder clips
A mallet
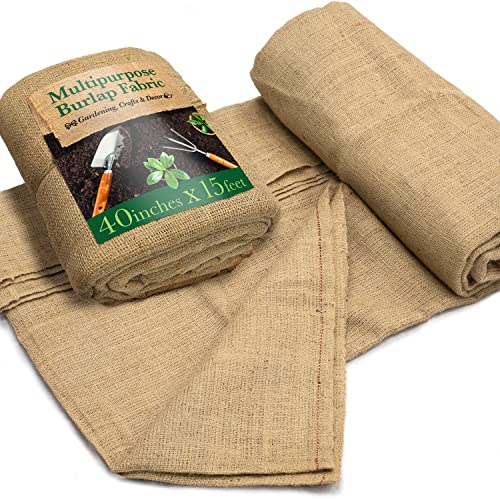
Plastic drop cloth or agricultural plastic (or other covering materials like burlap, shade cloth, or mosquito netting)
Bungee cords (for securing the bottom of the cover)


I used season extenders to start these dahlias early, then tied them up on the tent poles to give them support later in the summer.

Incandescent Christmas lights and some frost cloth keep these lettuces warm when the temperatures dip below 0℉.
How to Build Your Own Season Extender
Here’s a breakdown of how to construct the season extender:
1. Set Up the Frame
Use the mallet to pound your aluminum conduit into the ground at each corner of your raised bed. You can place the conduit at soil level or slightly above.
Slide the ends of the tent poles into the conduit. Take the fiberglass tent poles and create an arc by crossing them in the center. This cross-arch design adds strength and helps the frame withstand heavy snow or wind.
2. Add Structure for Stability
Where the tent poles cross, use zip ties to secure them together. This strengthens the structure and keeps everything in place, making it much more stable than a simple row of arches.
3. Cover the Frame
Once the frame is set up, it’s time to cover it. For winter, I used a plastic drop cloth, but you can opt for agricultural plastic if you want something more durable.
Cut the covering to fit your bed and attach it to the tent poles using large binder clips. If you’re in a windy area, like me, you can secure the plastic sheething to the bottom with bungee cords to ensure it stays in place.
For spring or summer use, you can swap out the plastic for other materials depending on your needs:
Shade cloth: Provides cooling shade during hot summer months.
Hail cloth: Protects plants from hail damage.
Burlap: Offers shade while allowing moisture and some sunshine to filter through.
Mosquito netting: Perfect for keeping pests like cabbage moths away from your brassicas.
4. Using the Frame Year-Round
What’s great about this setup is that once it’s built, it’s incredibly versatile. You can use it throughout the year and adjust the cover based on the season. For instance, in the summer, you might drape shade cloth or mosquito netting over the frame, while in the winter, the plastic sheeting offers protection from the cold.
This frame design is so sturdy that it can support even the heaviest snow loads. And since the frame uses cross-arches, it won’t collapse like a row of simple arches might under stress.
This video shows you everything you need to assemble your own season extenders — and how to use them throughout the year, too.
Bonus Tip: Aesthetic Appeal
Not only are these season extenders functional, but they can also add beauty to your garden. If you’d like, you can grow vines like clematis on them in the summer. They can even make a lovely garden trellis while protecting your plants. And since the poles are unobtrusive, they can stay in place year-round without detracting from the overall look of your garden. They aren’t a visual blight on your garden like PVC pipe and other solutions.
Easy to Store
When you’re done for the season, the entire setup is easy to take down and store. The tent poles take up very little space, making them easy to pack away until next season.
Final Thoughts
Using season extenders in your garden can dramatically change your gardening game. Whether you’re extending your growing season into the colder months or protecting your plants from the heat of summer, these simple structures can help you grow healthy vegetables all year long.
I hope this guide has inspired you to give season extenders a try in your own garden. Feel free to drop any questions you have in the comments below, and don’t forget to subscribe for more gardening tips!
Happy gardening! 🌱


FAQs
-
A season extender is a structure designed to protect plants from extreme weather conditions, allowing you to grow vegetables or flowers for a longer period, especially in colder or hotter climates.
-
Season extenders can help you start gardening earlier in the spring, protect plants from frost in the fall, shield them from summer heat or hail, and extend your growing season throughout the year.
-
Yes, season extenders can be used for a variety of plants, including leafy greens, brassicas, and even some fruits and flowers. Adjust the covering material based on the plant's needs (e.g., shade cloth for heat-sensitive plants or plastic for winter protection).
-
Yes, season extenders are especially effective in raised beds, but they can also be used in in-ground gardens. The process is the same whether you're gardening in raised beds or directly in the ground.
-
For extra security, you can use bungee cords, landscaping staples, or clips to attach the bottom of the covering material to the ground or raised bed. In windy areas, bungee cords are recommended.
-
In winter, use a plastic drop cloth or agricultural plastic to keep your plants insulated from the cold. These materials will trap warmth and protect plants from frost.
-
Yes, the frame is designed to be sturdy and unobtrusive, so you can leave it up throughout the year. You can change the covering material depending on the season, such as switching to shade cloth in the summer and plastic in the winter.
-
The frame components, especially the fiberglass tent poles, are lightweight and compact, making them easy to store. Simply dismantle the structure and keep the parts in a dry, cool place until the next gardening season.
-
While season extenders are most beneficial in climates with extreme cold or heat, they can also help in temperate regions. Adjust the covering material to suit your climate's specific challenges, whether it's cold, heat, pests, or intense UV rays.
-
Yes! Using materials like mosquito netting or fine mesh can help protect your plants from pests like aphids or caterpillars, especially for crops like brassicas.
-
Inspect the frame and covering material regularly for wear and tear, especially after heavy storms or snow. Replace any damaged materials and make sure the structure is securely anchored for the next season.